42 labels using mail merge
Video: Create labels with a mail merge in Word Once your mailing addresses are set up in an Excel spreadsheet (see the previous video to learn how), it's a snap to get Word to create mailing labels from them. Create your address labels In Word, click Mailings > Start Mail Merge > Step-by-Step Mail Merge Wizard to start the mail merge wizard. How to Create and Print Labels in Word Using Mail Merge and Excel ... The first step is to start the merge using Start Mail Merge on the Mailings tab in the Ribbon: To start the merge and specify the main document for labels: Create a new blank Word document. Click the Mailings tab in the Ribbon and then click Start Mail Merge in the Start Mail Merge group. From the drop-down menu, select Labels. A dialog box ...
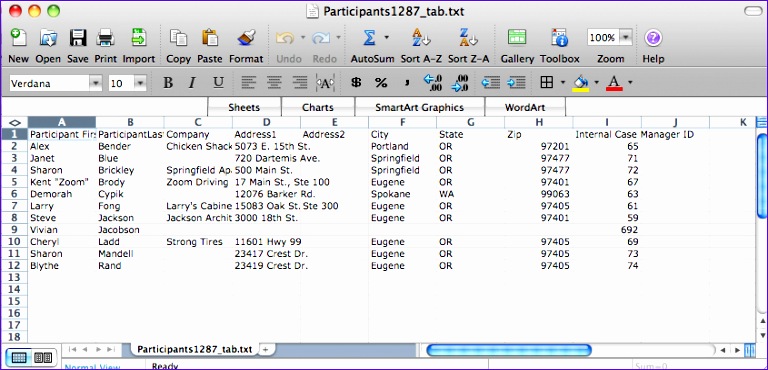
Mail Merge: Microsoft Word, Excel, Labels - LetterHUB Step 1: Set up your data source in Excel. If you're already using an Excel spreadsheet as your data source for a mail merge in Word, go to Step 2 in this topic. If the data source is a .txt or a .csv file that contains your Gmail contacts, for example, use the Text Import Wizard to set up your data in Excel.
Labels using mail merge
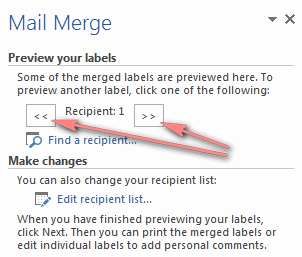
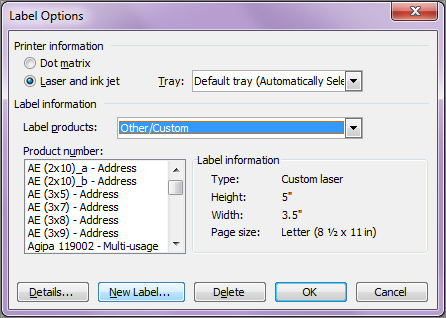
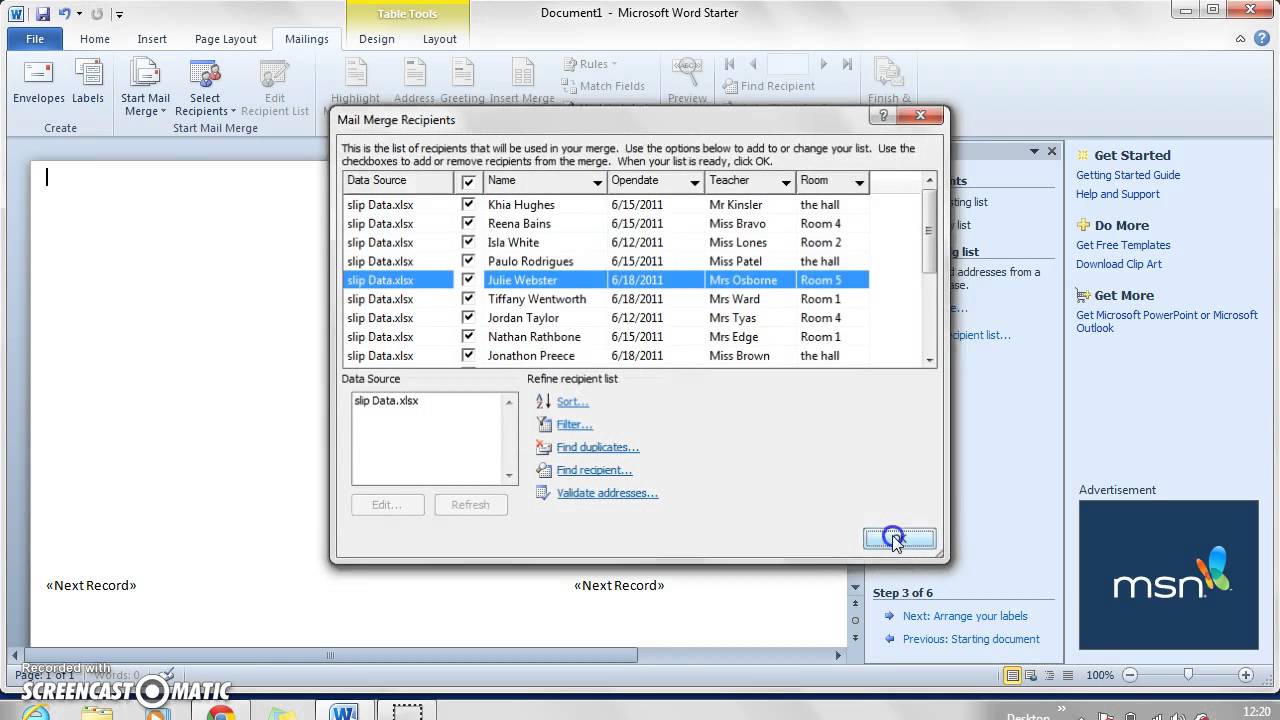
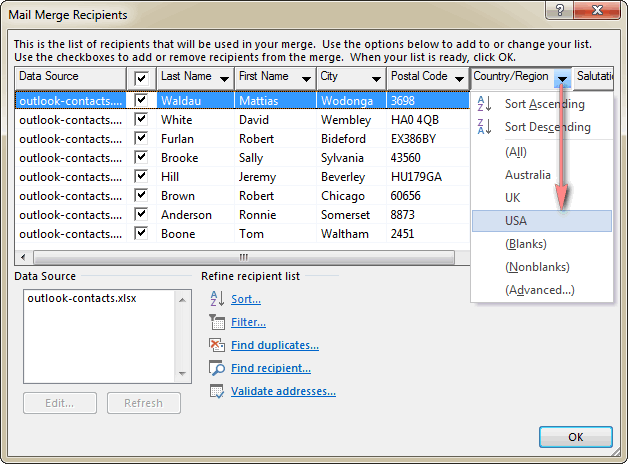
How to Create Mailing Labels in Word from an Excel List Step Two: Set Up Labels in Word Open up a blank Word document. Next, head over to the "Mailings" tab and select "Start Mail Merge." In the drop-down menu that appears, select "Labels." The "Label Options" window will appear. Here, you can select your label brand and product number. Once finished, click "OK." Mail merge using an Excel spreadsheet - support.microsoft.com Edit your mailing list Choose Edit Recipient List. In Mail Merge Recipients, clear the check box next to the name of any person who you don't want to receive your mailing. Note: You also can sort or filter the list to make it easier to find names and addresses. For more info, see Sort the data for a mail merge or Filter the data for a mail merge. How to Create LABELS in Microsoft Word Using Mail Merge - YouTube Whether you're mailing holiday cards or sending invitations to a wedding, you need a way to easily create mailing labels. Microsoft Word makes this easy to do, using a mail merge that pulls address...
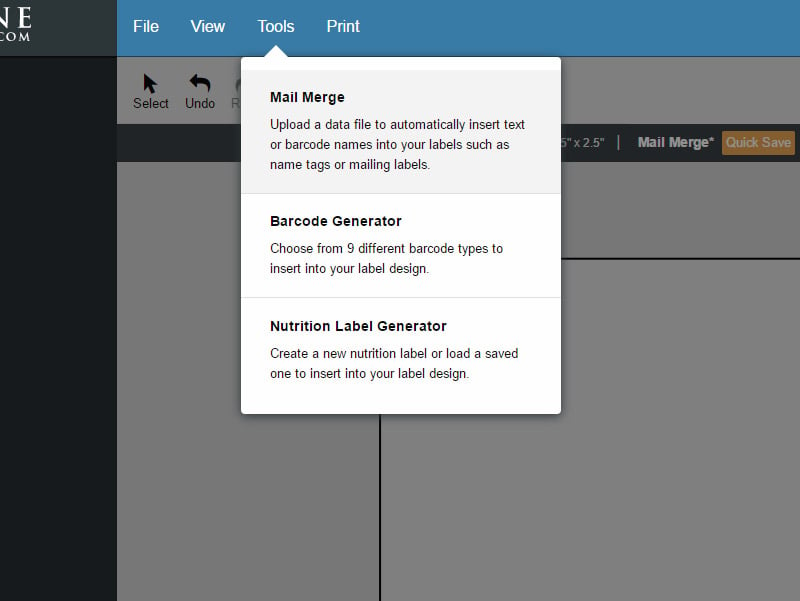
Labels using mail merge. How to Create Labels With a Mail Merge in Word 2019 Go to Mailings > Start Mail Merge > Labels. In the Label Options dialog box, choose your label supplier in the Label products list. In the Product number list, choose the product number on your package of labels. Tip: If none of the options match your labels, choose New Label, enter your label's information, and give it a name. Mail Merge Guide - Online Labels® Launch Maestro Label Designer and sign in. Open a new or saved template. Hover over "Tools" in the blue navigation bar and select "Mail Merge," then hit "Start Mail Merge." You will be prompted to add a new datalist or use an existing list. Note: If you don't have a document created yet, learn how to make one . How to Create Mail Merge Labels in Word 2003-2019 & Office 365 Click "Start Mail Merge." Select "Step by Step Mail Merge Wizard." Ensure "Change document layout" is selected and click "Next: Select recipients." Choose "Avery US Letter" from the second dropdown list and find the comparable Avery® product number from our cross-reference chart or choose "New Label" to manually enter the label specs. How to Mail Merge from MS Word and Excel (Updated Guide) Here's a step-by-step guide on how to create a mail merge template in MS Word: Step A. Open a new document ( blank document) in Word. This is the main document for your mail merge. Step B. Click on the Mailings tab and select Start Mail Merge.
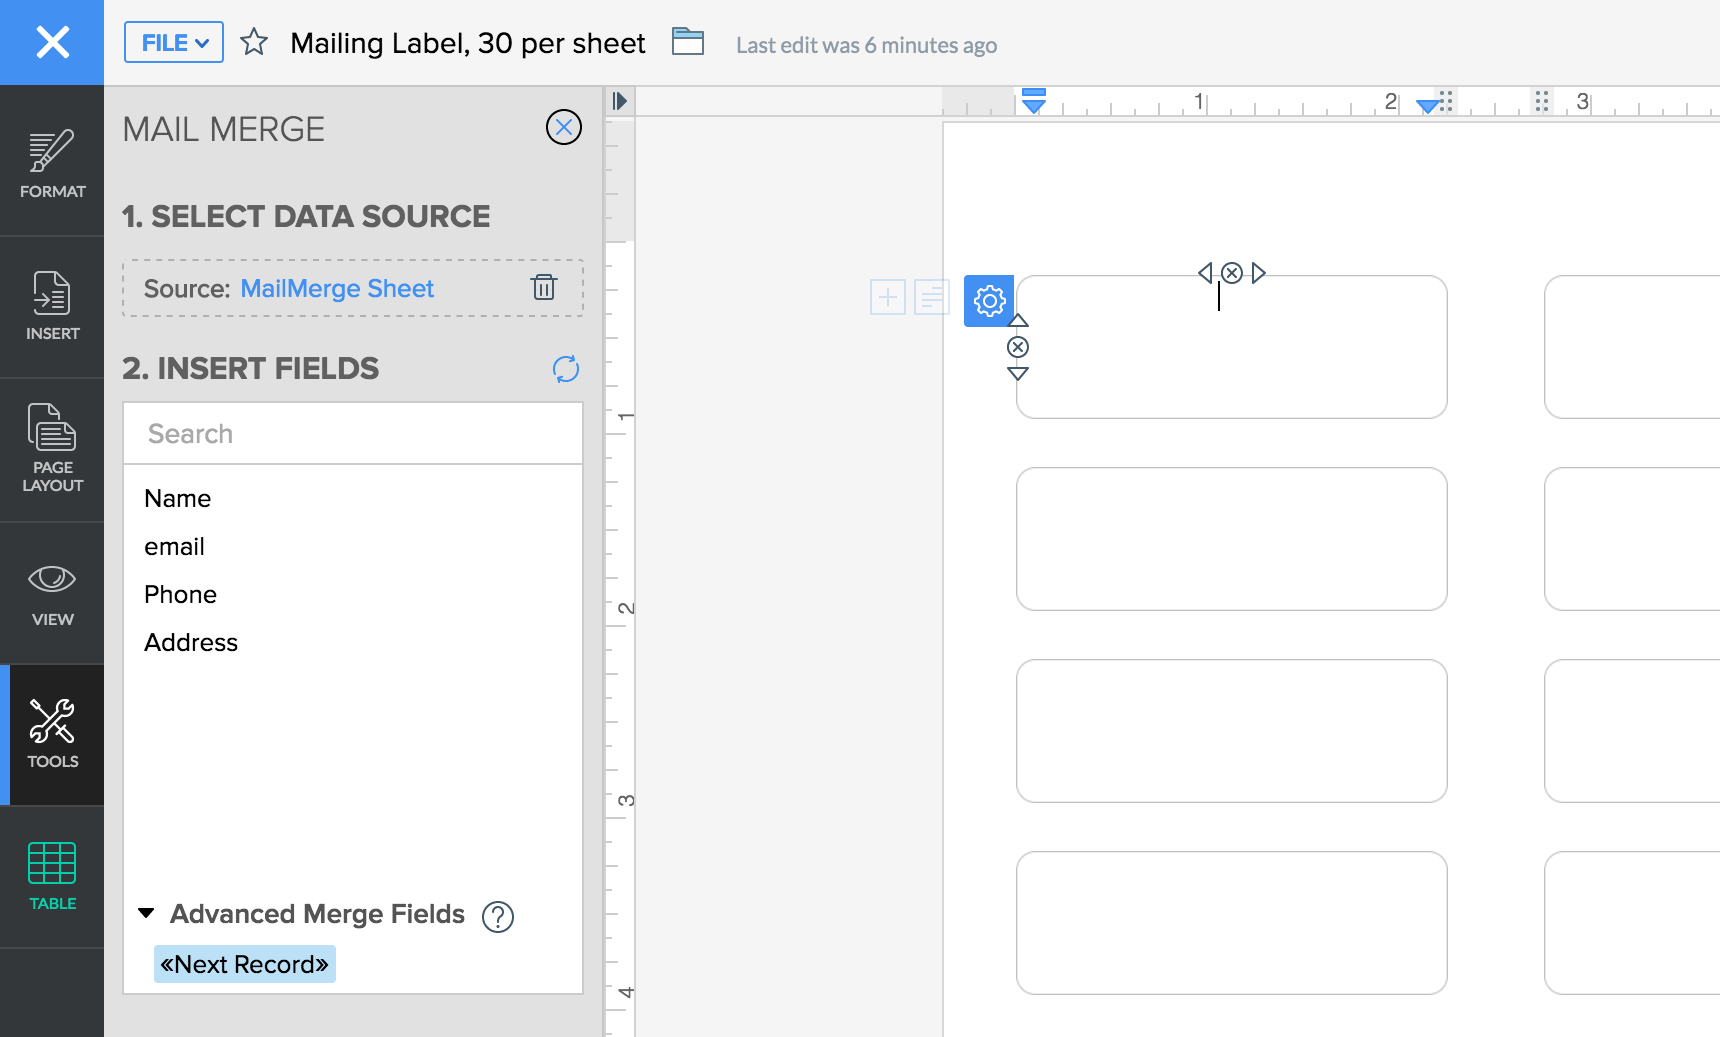
Video: Use mail merge to create multiple labels Use mail merge Create and print labels Video Use mail merge Video Format and add a graphic Video More options and custom labels Video Next: Creating an MLA paper with citations and a bibliography Overview Transcript If you wanted to create and print a bunch of recipient address labels, you could type them all manually in an empty label document. Create Your Own Labels Using Mail Merge - Paper Tiger Help and Support ... If you want to print a label for your open Items, insert row (s) to include the open Item (s) and then type in the Item number in the column entitled Item. Save the Excel worksheet. Step 2: Set Up the Label Main Document. Open Word and set up the label main document. The label main document is the page of labels that you start with. Use mail merge for bulk email, letters, labels, and envelopes Create and print sheets of mailing labels Directory that lists a batch of information for each item in your data source. Use it to print out your contact list, or to list groups of information, like all of the students in each class. This type of document is also called a catalog merge. Create a directory of names, addresses, and other information Create and print labels using mail merge - Sibanye-Stillwater Step 2: Prepare the main document for the labels In Word, choose File > New > Blank Document. On the Mailings tab, in the Start Mail Merge group, choose Start Mail Merge > Labels. In the Label Options dialog box, under Label Information, choose your label supplier in the Label vendors list.
How to mail merge and print labels from Excel - Ablebits When arranging the labels layout, place the cursor where you want to add a merge field. On the Mail Merge pane, click the More items… link. (Or click the Insert Merge Field button on the Mailings tab, in the Write & Insert Fields group). In the Insert Merge Field dialog, select the desired field and click Insert. How to create mailing labels by using mail merge in Word? If you want to create labels which include the information about name, company and telephone number for the co-partners, you can quickly do it by using mail merge function in Word. Recommended Productivity Tools for Word More Than 100 Powerful Advanced Features for Word, Save 50% Of Your Time. Free Download PDF Quick Guide to Printing Labels Using Mail Merge Now open Microsoft Word, go to the "Tools" menu, and select "Mail Merge" from the "Letters and Mailings" submenu. The Mail Merge wizard will open on the right side of the screen. Under "Select document type," choose "Labels" and then click on "Next" at the bottom right of the screen. Preparing Envelopes and Labels with Mail Merge - Kubicle We'll then open up the Mail Merge wizard and choose labels in step one. In step two, we'll click label options. Here, we'll need to track down the type that Fetch Cuisine uses, A4 sheets of Avery labels with the product code J8159. Under label vendors we'll select Avery A4/A5 to narrow down the number of products in the box below.
How to make labels from Excel using Mail Merge
Print labels for your mailing list - support.microsoft.com We will use a wizard menu to print your labels. Go to Mailings > Start Mail Merge > Step-by-Step Mail Merge Wizard. In the Mail Merge menu, select Labels. Select Starting document > Label Options to choose your label size. Choose your Label vendors and Product number. You'll find the product number on your package of labels. Select OK .

31 Mail Merge Label Printing - Labels Database 2020
How to mail merge and print labels in Microsoft Word Step one and two In Microsoft Word, on the Office Ribbon, click Mailings, Start Mail Merge, and then labels. In the Label Options window, select the type of paper you want to use. If you plan on printing one page of labels at a time, keep the tray on Manual Feed; otherwise, select Default.

How to Mail Merge in Microsoft Word: 12 Steps (with Pictures)
How to Create LABELS in Microsoft Word Using Mail Merge - YouTube Whether you're mailing holiday cards or sending invitations to a wedding, you need a way to easily create mailing labels. Microsoft Word makes this easy to do, using a mail merge that pulls address...

Creating Mailing Labels Using The Mail Merge Helper In MS Word 2003 - Library & ITS Wiki
Mail merge using an Excel spreadsheet - support.microsoft.com Edit your mailing list Choose Edit Recipient List. In Mail Merge Recipients, clear the check box next to the name of any person who you don't want to receive your mailing. Note: You also can sort or filter the list to make it easier to find names and addresses. For more info, see Sort the data for a mail merge or Filter the data for a mail merge.
33 Mail Merge Label - Labels For Your Ideas
How to Create Mailing Labels in Word from an Excel List Step Two: Set Up Labels in Word Open up a blank Word document. Next, head over to the "Mailings" tab and select "Start Mail Merge." In the drop-down menu that appears, select "Labels." The "Label Options" window will appear. Here, you can select your label brand and product number. Once finished, click "OK."
How to distribute documents in Zoho Writer
6 Mail Merge Excel Template - Excel Templates - Excel Templates

My Computer Girl Inc., Lakeland Florida ~ Free Computer Help, Tips and Tricks: Create mailing ...
OneNote's Outlook Mail Merge Example - Office OneNote Gem Add-Ins

Labels

3 Ways to Do a Mail Merge - wikiHow

Simple Office Ideas : How to create Multiple Mailing Labels Per Page in Word Without Using the ...
How To Create Mail Merge Labels - YouTube

Medtelligent | Creating a Mail Merge Template to Use with ALIS

10 Excel Mail Merge Template - Excel Templates
34 Online Labels Maestro Label Designer - Labels For Your Ideas
How to make labels from Excel using Mail Merge

My Computer Girl Inc., Lakeland Florida ~ Free Computer Help, Tips and Tricks: Create mailing ...
Post a Comment for "42 labels using mail merge"